UGC Style Reel Templates: Guide 2026
Reusable UGC Reel templates with hooks, shot lists, editing tips, disclosure rules, and tests to boost Instagram Reels growth.
Reusable UGC Reel templates with hooks, shot lists, editing tips, disclosure rules, and tests to boost Instagram Reels growth.
4.98 /5 - from 58k reviews
Trusted by 50,000+ creators — get real engagement delivered to your profile in minutes, not days.
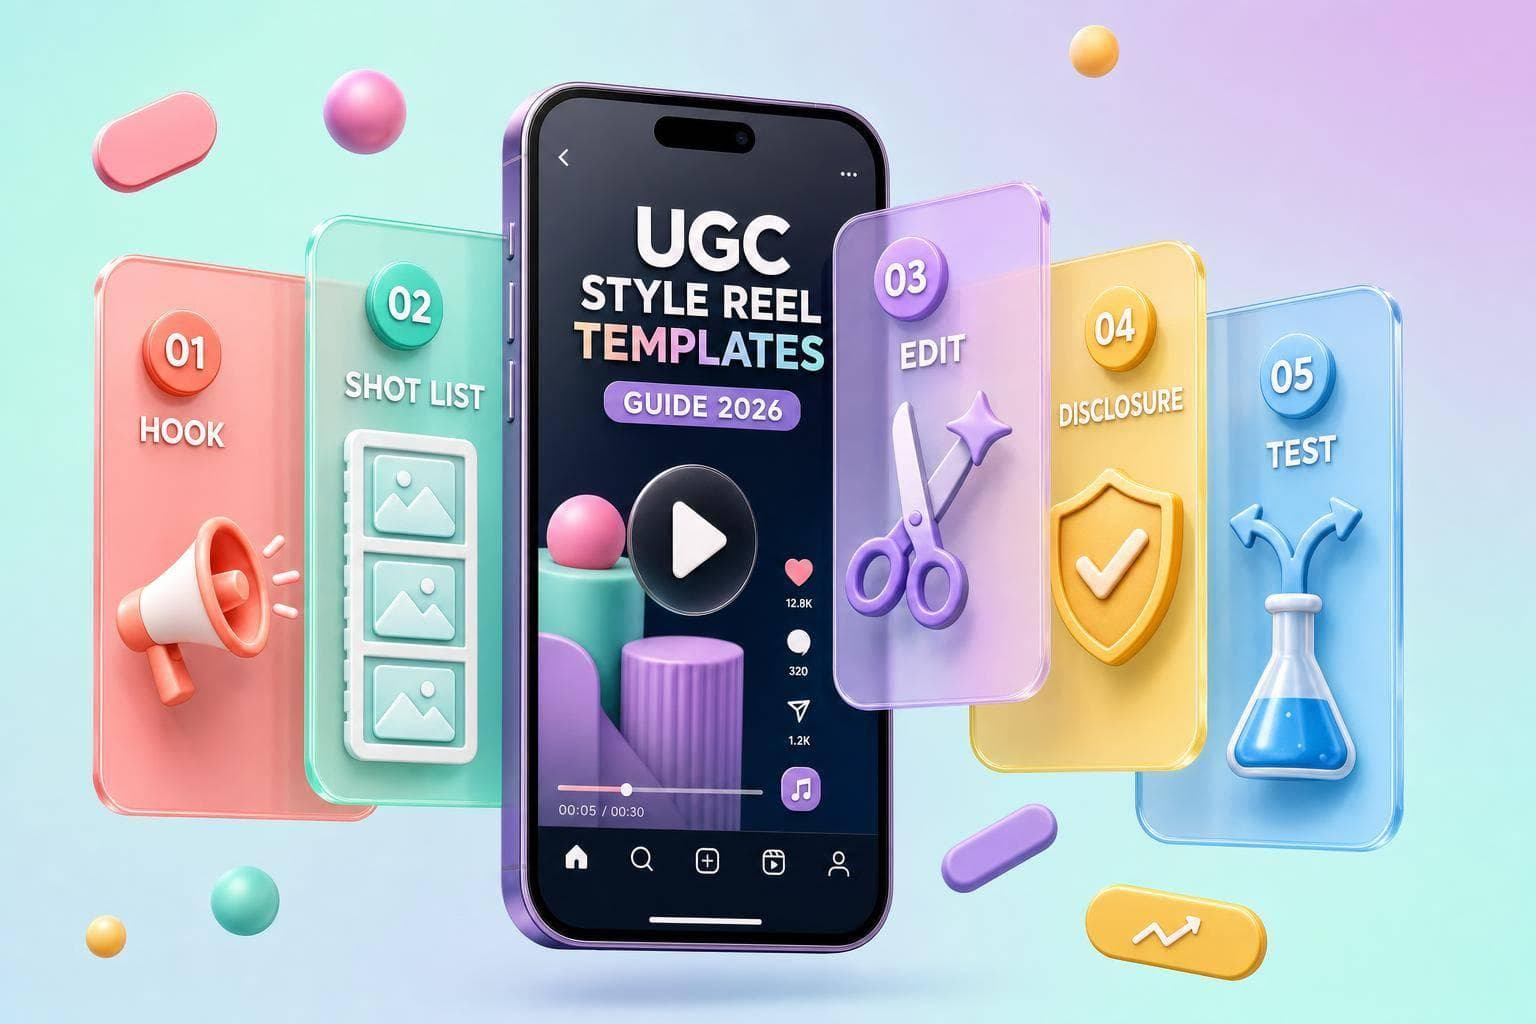
If I want more Instagram growth from Reels in 2026, I don’t need to guess. I need a simple format I can reuse, test, and improve.
This guide comes down to a few clear points:
The article covers 9 main UGC-style Reel formats:
It also shows when to use:
A few numbers stand out:
I also need to build in U.S. ad disclosure early. If a creator got paid, got free product, or uses affiliate links, the Reel should say “Ad” or “Paid partnership” in the first 1–2 seconds.
| Area | What I should do |
|---|---|
| Goal | Match the Reel to awareness, trust, or conversion |
| Hook | Show the product, problem, or result right away |
| Structure | Use hook → setup → demo/proof → result → CTA |
| Filming | Get wide, medium, close, alternate takes, and reaction shots |
| Editing | Cut pauses, keep captions readable, and trim hard |
| Tools | Use CapCut for speed, InShot for manual control, Canva for brand consistency |
| Testing | Change one variable at a time |
| Metrics | Track more than views; watch saves, shares, visits, follows, and clicks |
The main idea is simple: UGC-style Reels work better when I treat them like a repeatable system, not a one-off post.
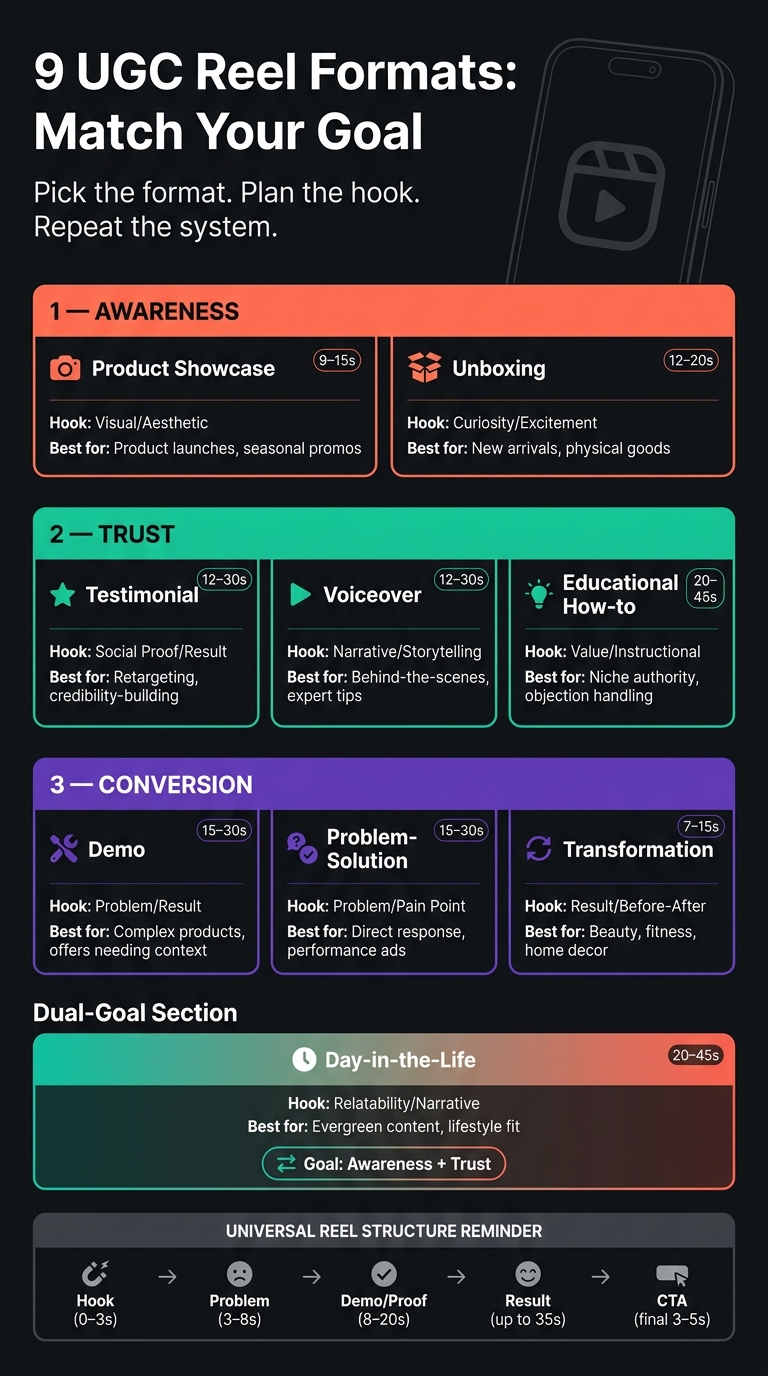
9 UGC Reel Formats: Goals, Duration & Hook Styles (2026)
These nine Reel formats cover the main Instagram use cases in 2026. Each one lines up with a different job: awareness, trust, or conversion. And each follows a clip order you can reuse without reinventing the wheel every time.
Awareness formats are meant for cold audiences. These are people who don't know your brand yet, so the Reel needs to stop the scroll and go viral.
A product showcase Reel is a go-to here. Start with a bold visual hook, then show multiple angles, a main use shot, close-up details, and a CTA overlay. Unboxing Reels also fit this goal, especially for physical products and new arrivals. The structure is simple: package arrival → opening → first reveal → close-up details → first reaction.
Trust formats fit warm audiences. These viewers have seen your brand before, but they haven't taken action yet.
A testimonial Reel usually starts with a result-led hook, then moves into a short story, a specific result or data point, and an emotional payoff before a soft CTA. An educational how-to Reel builds authority by walking viewers through a process one step at a time, with each clip showing one action. Voiceover Reels mix B-roll with a single narration track and work well for behind-the-scenes footage and expert tips.
Conversion formats are for people who are close to making a choice.
A problem-solution Reel starts with the pain point, brings in the product, shows the result, and ends with a CTA. Transformation Reels are even tighter. They usually use just 2–4 clips and depend on a strong before-and-after contrast. A demo Reel tends to work best with this sequence: problem → proof → demo → objections → offer. That's especially useful when a product needs a bit more context before someone is ready to buy.
Day-in-the-life Reels can work for both awareness and trust. They place the product into everyday routines so it feels natural instead of pushy. In most cases, the product should show up naturally in 2–4 scenes.
Once you've picked the format, the next step is matching the opening frame and clip order to the goal. The hook should change based on what the Reel is trying to do. In practice, four hook styles handle most cases:
After the hook, context usually lasts just 2–3 seconds. That's enough to show who is speaking and why the viewer should care. Proof is often the longest part of the Reel. That could be a demo, a before-and-after, or a specific result. Then the outcome closes the story, and a soft CTA finishes the Reel.
For conversion-focused content, prompts like Save this for later, Tap the link in bio, or Comment for details can work well.
One rule matters more than most: the first frame should show the product, the problem, or the result. If the video waits too long to get there - walking to camera, setting up a tripod, or slowly panning across a room - you'll lose viewers before the story even starts.
| Format | Primary Goal | Duration | Hook Style | Best Use Case |
|---|---|---|---|---|
| Product Showcase | Awareness | 9–15s | Visual/Aesthetic | Product launches, seasonal promos |
| Unboxing | Awareness/Trust | 12–20s | Curiosity/Excitement | New arrivals, physical goods |
| Demo | Conversion | 15–30s | Problem/Result | Complex products, offers that need more explanation |
| Testimonial | Trust/Conversion | 12–30s | Social Proof/Result | Retargeting, credibility-building |
| Problem-Solution | Conversion | 15–30s | Problem/Pain Point | Direct response, performance ads |
| Transformation | Awareness/Conversion | 7–15s | Result/Before-After | Beauty, fitness, home decor |
| Day-in-the-Life | Awareness/Trust | 20–45s | Relatability/Narrative | Evergreen content, lifestyle fit |
| Voiceover | Trust/Education | 12–30s | Narrative/Storytelling | Behind-the-scenes, expert tips |
| Educational How-to | Trust/Authority | 20–45s | Value/Instructional | Niche authority, objection handling |
Next, turn these formats into shot lists and script blocks.
Once you pick the template, turn it into a shot list and script before filming. That helps you avoid missing key footage, move faster in editing, and keep the Reel aligned with your Instagram marketing strategies.
A strong UGC Reel shot list usually includes product-in-environment wide shots, macro close-ups, hands-in-action inserts, lifestyle b-roll, reaction shots, and before-and-after visuals when the category makes sense.
Why does that matter? Because editors need options. With enough variety, they can cut multiple Reel versions from the same shoot instead of asking for a reshoot.
For each key moment, capture:
That extra coverage gives you room to test different hooks, proof points, and CTAs without filming again. It also makes it much easier to line up each shot with the script blocks below.
Most UGC Reels use five blocks: Hook (0–3s), Problem (3–8s), Solution or Demo (8–20s), Proof or Result (up to 35s), and CTA (final 3–5s).
Keep each block focused on one idea. And write the way people talk, not the way product pages read.
On-screen text should be even shorter than the spoken line. In most cases, that means a few words or one short phrase that someone can scan on a phone screen in a split second. Since many people watch UGC Reels with the sound off, text isn't just decoration. It's part of how the Reel communicates.
Short transition lines like Here's why or Watch this can help each block flow into the next without feeling choppy.
For U.S. brands, disclose any payment, free product, or affiliate compensation in the Reel itself. That disclosure should appear as on-screen text or a spoken disclosure within the first 1–2 seconds. Use plain language like Ad or Paid partnership, not a buried hashtag.
The smart move is to build that disclosure into the template from the start, so it doesn't get cut in the edit.
| Script Block | Required Shot Types | Spoken Line / On-Screen Text | Compliance Notes |
|---|---|---|---|
| Hook | Reaction shot, product-in-hand shot, or before visual | One punchy line; on-screen: a few words | Place the disclosure overlay in the first 1–2 seconds. |
| Problem | Lifestyle b-roll showing frustration or an unmet need | Relatable pain point; on-screen: short label | Keep the issue specific to the creator's actual experience |
| Solution / Demo | Product-in-use, over-the-shoulder, or hands-in-action insert | Show the action, then explain it; on-screen: key benefit | Claims must reflect actual experience; avoid absolute language like guaranteed or cures |
| Proof / Result | Close-up detail, before-and-after visual, or result shot | Specific result or observable change; on-screen: short proof cue | Before-and-after visuals must be representative and may need context to avoid misleading comparisons |
| CTA | Direct-to-camera closing shot | Clear next step, such as save this, comment for details, or link in bio to drive traffic from Instagram | CTA wording should not imply guaranteed outcomes |
Mapping each block to its shot type before filming also helps you judge brand fit early. If a creator's natural style doesn't line up with the tone a block needs, fix the brief or change the creator match before production starts.
Before filming, score brand fit on:
Treat your shot list and script blocks like the edit map. That’s what shapes retention. A clean, fast cut keeps people watching. A slow one can lose them in the first few seconds.
Start by importing every clip and tagging your best hook, demo, and proof shots. Then build the timeline in this order: hook → problem/context → proof/demo → CTA.
After that, trim hard.
Cut pauses longer than about half a second. Remove filler words. Delete frames where the creator looks away or adjusts the camera. Keep talking-head clips around 1.5–3 seconds. Demo clips can stretch to 4–5 seconds, but only if the motion still holds attention.
Add hard-coded captions after trimming, not before. If you change the timeline first, caption timing can slip out of place. Keep subtitles 10–15% above the bottom edge so they don’t clash with interface buttons.
For styling, keep it simple:
If you want more than one version from the same footage, duplicate the project instead of rebuilding it. A smart setup is to start with a 25–35 second master cut that includes every block. Then trim that down into a 15–20 second performance cut by removing extra context and side details. For retargeting or fast-scroll viewing, an 8–12 second snippet built around one claim can work well. Keep fonts, colors, and logo placement the same across every version so you’re testing duration, not brand presentation.
Each version gives you something to test: the hook, the pacing, or the CTA.
Set background music at about -15 to -20 dB under the voiceover so speech stays clear on phone speakers. Cut visuals on the beat or on voice emphasis when you can. For example, switching to a proof shot right as the creator lands a key line makes the Reel feel tighter and more deliberate.
A lot of U.S. viewers watch with the sound off or barely on. That’s why hard-coded captions and text overlays need to carry the full message by themselves. Audio should help the Reel, not do all the work.
Pick your editing app based on one thing: speed, control, or brand consistency.
You can also use AI before you even start editing. Generate several hook options first, then test them. Use UpGrow audience insights to brief AI with hooks and topics your target followers already react to. The point isn’t to become a power user of every tool. It’s to test hooks, pacing, and retention faster.
Here’s the short version:
Adobe Premiere Rush fits team-based or multi-platform work that needs stronger audio tools and multi-device sync. VN Video Editor is a free option with a desktop-style timeline on mobile. Instagram's native editor cuts out the export step, so you can edit and publish in one place with in-app audio and auto-caption stickers.
| App | Platforms | Key UGC Features | Main Strength for Fast Reels |
|---|---|---|---|
| CapCut | iOS, Android, Web | Auto-captions, beat sync, ready-made templates, transitions, audio library | Fast path from vertical clips to a structured Reel with AI assistance |
| InShot | iOS, Android | Manual and auto subtitles, trim/split tools, filters, music library, 9:16 canvas | Intuitive manual control for editors who prefer hands-on pacing |
| Canva Video | iOS, Android, Web | Brand kit integration, drag-and-drop overlays, stock footage, basic transitions | Consistent brand identity across multiple UGC assets |
| Adobe Premiere Rush | iOS, Android, Desktop | Advanced audio tools, precise trimming, multi-device sync, Creative Cloud integration | Greater editorial control for team-based or multi-platform workflows |
| VN Video Editor | iOS, Android | Timeline editing, keyframe controls, transitions, built-in effects | Free, capable option with a desktop-style timeline on mobile |
| Instagram Native Editor | iOS, Android | Trim, clip reorder, transitions, filters, auto-caption stickers, text-with-timing | Zero export step; publish directly from edit with in-app audio and captions |
Export final cuts at 1080×1920, 30 or 60 fps, then upload natively.
Once you've edited a template, test one variable at a time to see what's doing the work. Use the same base template, change a single element, and compare the outcome. That's how you get a clean read instead of a messy guess.
Choose one product angle for each batch. Keep the proof footage the same across all versions, then change only the hook. A problem-led opener, a result-led opener, and a curiosity-driven opener will each pull in a different kind of viewer intent. Test one length per batch, then stick with the top performer. Compare results during the first 24–72 hours.
After you find the winning hook, move to proof. Try before-and-after clips, screen recordings, or product-in-use shots. Then test the CTA wording. When you change one element at a time, the results stay easy to read.
Measure each template against the metric that fits its role. Awareness templates should increase reach and reach from non-followers. Trust templates should earn saves and shares. Conversion templates should drive profile visits, follows, and clicks.
A Reel with moderate reach but high saves can end up being a stronger long-term asset than a high-reach Reel with weak retention. That's why it helps to track saves per reach and shares per reach, not just raw view counts.
Views alone don't tell the full story. Track results by audience quality too. UpGrow's real-time analytics dashboard connects Reel performance to follower growth, not just views. If a Reel gets strong reach but weak follower gain, the template may be pulling broad curiosity without bringing in the right audience. UpGrow's AI targeting and audience filters help you check whether the content is landing with the specific segments you're trying to build. When a version shows clear traction, the Boost™ tool can speed up follower growth from that structure.
| Template Goal | Signal | Decision |
|---|---|---|
| Awareness | High reach, low saves | Scale - strong top-of-funnel pull |
| Trust | High saves, high shares | Refine - add more proof clips |
| Conversion | High profile visits and clicks | Scale - use as ad creative |
| Trust/Education | Completion rate below 40% | Drop - cut duration and retest |
Look for patterns across batches, not single posts. If a template keeps earning saves over several rounds, it deserves a spot in your permanent library. If it underperforms twice in a row, even with a different hook, it's probably time to retire it instead of tweaking it forever.
Templates turn into growth systems when you test them against the right metric. Tight hooks, goal-matched formats, and steady tracking can turn single Reels into a content system that keeps building over time.
Start by matching a hook formula to your Instagram goal.
For education, use a problem-solution or step-by-step template. For product demos, go with a fast-fix or diagnostic hook.
Keep videos short, ideally 7 to 15 seconds, since that format often gets better completion rates. And don’t stick with one opener and hope for the best. Test a few hook versions to see which one clicks with your audience.
Start with 3 to 6 hook versions and keep the rest of the Reel the same, including the content, format, and targeting. That gives you a clean way to see whether the opening line is doing its job.
If you want a simpler test, 2 to 3 variants can still work.
If you're pushing harder on optimization, test 5 to 10 versions. Just keep the experiment clean: change ONLY the first 1 to 3 seconds so your results point to hook performance, not something else.
A UGC-style Reel works best when it leans into human, unscripted storytelling instead of polished production. Talk from personal experience. Share a specific mistake and the lesson that came from it, or point to a real struggle your audience will recognize right away.
The visuals should match that same honest feel. Use plain backgrounds, look straight at the camera, and skip overly staged setups. Above all, the hook should sound like a person talking - not like someone putting on a performance.