
15 Fitness Reel Ideas for Instagram 2026
15 short, saveable Instagram Reels formats—workout demos, form tips, meal prep, and client proof—plus batching and CTA tips.
15 short, saveable Instagram Reels formats—workout demos, form tips, meal prep, and client proof—plus batching and CTA tips.
4.98 /5 - from 58k reviews
Trusted by 50,000+ creators — get real engagement delivered to your profile in minutes, not days.
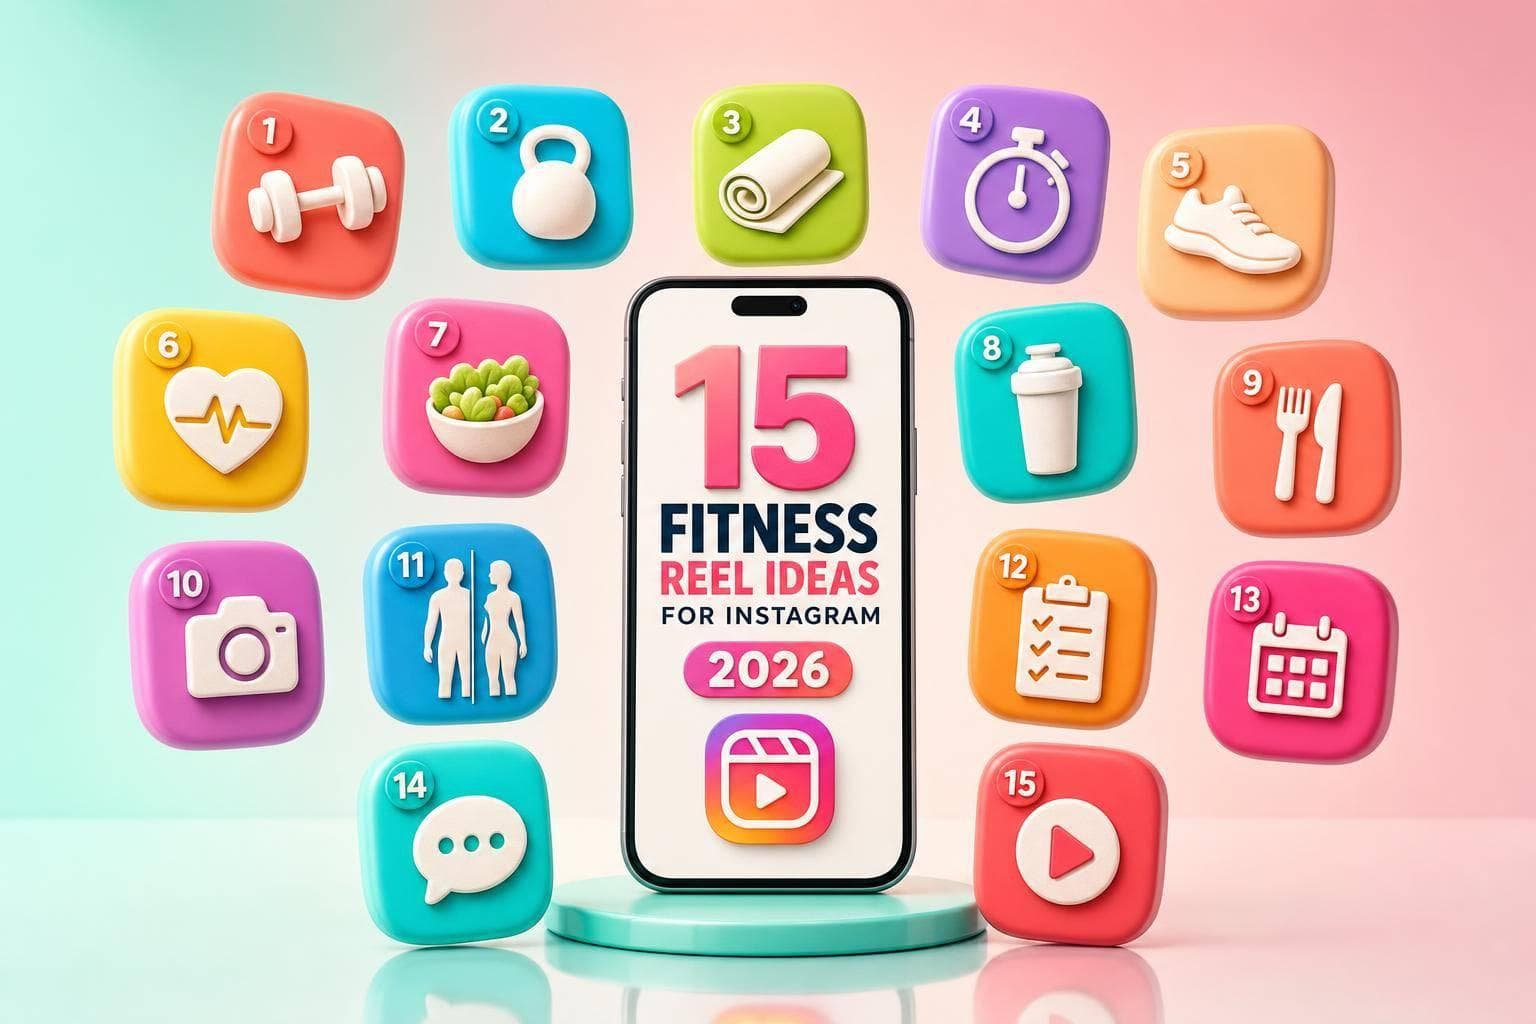
If you want more Instagram fitness views in 2026, keep your Reels short, clear, and built around one job: teach a move, fix form, show a meal, or prove results. I’d focus on 30–60 second Reels, a strong first 1–3 seconds, on-screen text for mute viewing, and simple weekly series people can save and revisit.
Here’s the full list at a glance:
I’d also keep the mix simple:
And I’d batch film in 2–3 hours so posting stays consistent without taking over your week.
Quick Comparison
| Content type | What it does | Best length | Why people watch |
|---|---|---|---|
| Workout demos | Shows exercises fast | 10–45 sec | Saves for later workouts |
| Form tips | Fixes one mistake | 15–30 sec | Fast coaching help |
| Nutrition | Shows food + macros | 30–60 sec | Meal ideas and planning |
| Social proof | Shows client results | 15–45 sec | Builds trust and interest |
If I were building a fitness Reel plan from scratch, I’d start with these 15 formats and turn them into a simple weekly rotation.
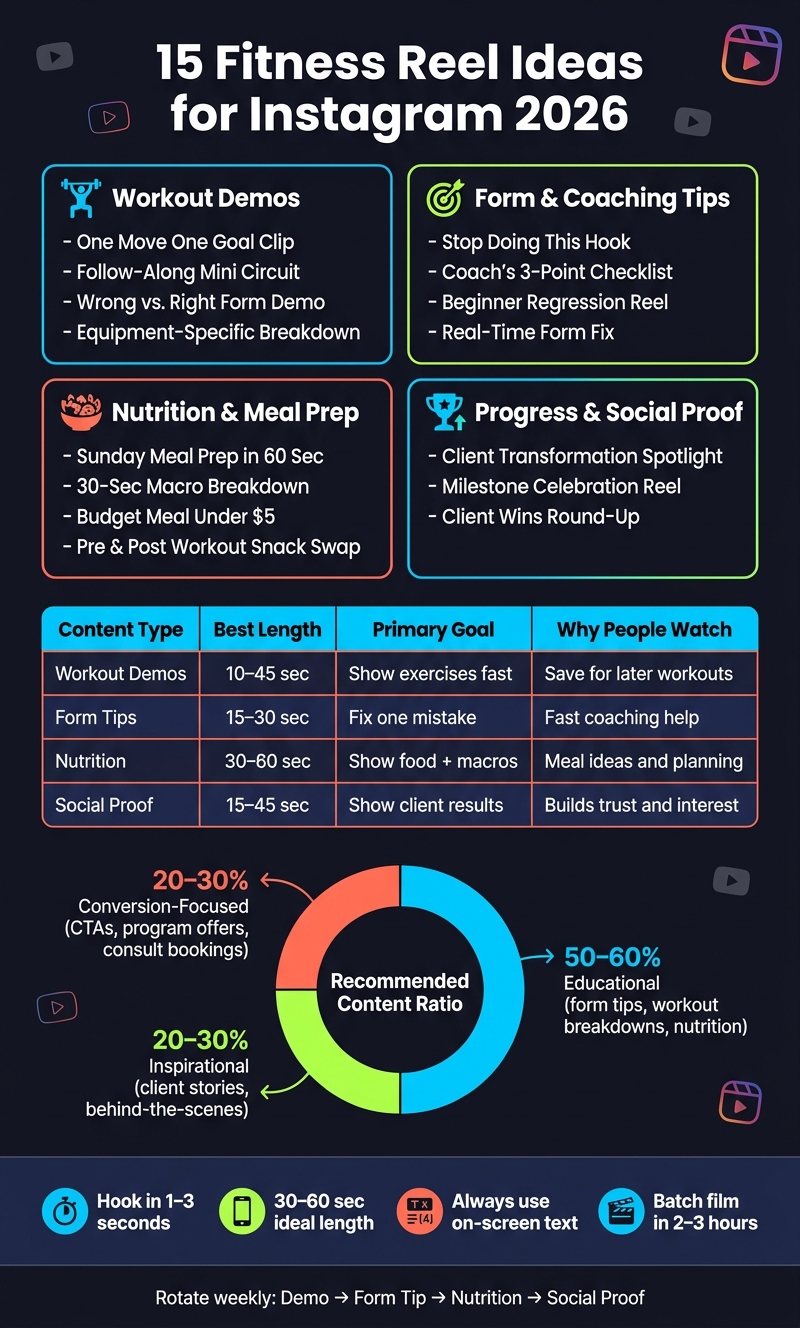
15 Fitness Reel Ideas for Instagram 2026: Content Pillars at a Glance
The fitness Reels that tend to do well in 2026 usually fit into four main content pillars: workout demos, form and coaching education, nutrition support, or client wins and before-and-after proof. Those four pillars make choosing a Reel format much easier. Instead of guessing, you can match each idea to one of these buckets.
The first 1–3 seconds matter most. That’s the window where people decide if they’ll keep watching or scroll away. Start with a bold on-screen promise, then match it with the first shot right away. Think: "3 glute moves better than squats" or "High-protein lunch under $6 in 10 minutes". Skip the greeting, skip the logo intro, and skip the slow zoom. Get to the point fast.
Use on-screen text in every Reel. A lot of Reels are watched on mute, so captions and labels do a lot of the heavy lifting. For workout demos, label each exercise and add short coaching cues like "keep chest up" or "heels stay grounded". That way, the Reel doesn’t just look good. It also works as something people can save and come back to later.
For nutrition clips, put the key info right on the food. Tags like "25g protein" and "under 500 calories" make the payoff easy to spot at a glance. That matters because viewers often decide in a split second whether a Reel is worth their time.
Production doesn’t need to get fancy. A smartphone, a tripod, and natural light are enough. What matters more is the editing. Cut faster, and change something every 2–3 seconds - the angle, the text, or the shot itself. That rhythm helps hold attention without making the Reel feel chaotic.
Finish with one clear CTA tied to a single action. For example:
Next: 15 Reel ideas built from these four pillars.
Workout demos work because they show one move and one clear result fast. That’s why they’re a smart place to start. If you want save-worthy Reels without making production a whole thing, this format gets the job done.
Here are four workout demo templates to add to your content library:
Show one exercise tied to one clear goal - like a glute bridge for glutes or a dead bug for core. Keep it to 10–15 seconds. Film from a side or three-quarter angle so form is easy to see, and use a simple overlay like "3 sets × 12 reps / 15 lb dumbbells."
Create a 30- to 45-second Reel with 3–4 follow-along exercises. Use on-screen countdowns in mm:ss format, such as "45 sec on / 15 sec rest," and label each move clearly.
Start with the common mistake under a "WRONG" label, then cut to the correct version with "DO THIS INSTEAD." Add one simple cue on screen, such as "knees track over toes" or "keep your heels grounded."
Focus on one tool, like a kettlebell or 15 lb dumbbells, and show three beginner-friendly moves. Label each move with the muscle group targeted and the starting weight. This format is easy to batch in one shoot, then turn into weekly posts.
Form and coaching Reels get saved for a simple reason: they fix one problem fast. One movement. One cue. That’s what makes this form-and-coaching pillar work so well. If you want repeatable posts you can keep using, these four templates are a strong place to start.
Here are four formats that work:
Open with a bold text hook in the first 1–2 seconds, like Stop doing this in your deadlifts. Show the common mistake first, such as a rounded lower back or the bar drifting away from the legs, and label it WRONG. Then cut to the fix and put one clear cue on screen: Push hips back, keep the bar close to your shins. Keep the Reel short, clean, and easy to follow.
Stand next to a client, or demo the move on your own, and break one exercise into three fast checkpoints. For squats, that could be: Feet shoulder-width apart → knees track over toes → chest stays proud. Add numbered text overlays and arrows that point to the joints you're talking about so the viewer can follow along right away.
Show how to scale a movement down in a safe, simple way. For example, swap a back squat for a goblet squat, or a floor push-up for an incline bench push-up. Label these as scaled versions. A caption like "Knees bother you at full depth? Start here." makes the post feel direct and helpful. It also helps more people see themselves in the Reel.
Film a short coaching moment where you give one cue and the change shows up within a few reps. For example: Drive your elbows toward the ceiling, not the floor. That visible before-and-after shift is the proof, and it makes the advice stick.
Use text overlays that are easy to read with the sound off.
Next: use the same structure for nutrition and meal prep Reels.
Nutrition Reels tend to do best when they show the food, the numbers, and the result fast. That’s what makes them easy to watch, easy to batch, and easy to save for later.
Here are four formats that work well:
These food clips pair well with progress posts that show the results.
If the first three pillars show the work, this one shows the result. Progress Reels turn results into trust. That matters for trainers, gyms, and wellness brands that want to sell without sounding pushy.
Here are three Reel formats that turn client wins into proof:
Use one CTA: "DM 'START'" or "Tap the link in bio."
Once you’ve built out the ideas, turn them into a simple weekly system. Think of these 15 ideas as a content library, not a box you need to check off one by one. The goal is to rotate through the four core categories - Workout Demos, Form & Coaching Tips, Nutrition & Meal Prep, and Progress & Social Proof - on a steady schedule.
A simple weekly rhythm could look like this: Monday for a workout demo, Tuesday for a form tip, Wednesday for a nutrition or meal prep clip, Thursday for a client win or before-and-after, Friday for a myth-busting Reel, and the weekend for a behind-the-scenes clip. Once that pattern is in place, you’re not starting from zero every week. You’re just swapping in new exercises, meals, or client stories. That makes batch filming much easier too, since many teams can shoot a full week of Reels in 2–3 hours.
After you publish, reuse the best-performing Reel in other formats. One squat form-tip Reel can turn into a carousel, a Story poll, and a short email. If you have a multi-episode form series, the top clips can also be edited into a longer educational video or used in a paid ad.
To keep your content mix balanced, aim for about 50–60% educational content, 20–30% inspirational content, and 20–30% conversion-focused content. Educational Reels can cover form tips, workout breakdowns, and nutrition explainers. Inspirational Reels can show client stories and behind-the-scenes moments. Conversion-focused Reels should give people a clear next step, like booking a free consult, joining a challenge, or checking out a program offer. Use UpGrow's live dashboard to track which Reel types drive follows and profile visits.
Strong fitness Reel libraries in 2026 come from repeatable formats, not random one-time viral wins.
When you keep rotating through training tips, nutrition help, social proof, and repeatable series, you give people a reason to come back. Each content pillar does a different job. Workouts show your know-how, meal prep adds day-to-day use, and client progress stories show that what you teach gets results.
To turn this into a system, keep it small at first and repeat it. Start with:
Then run that rotation on a steady schedule for a few weeks and watch what sticks.
Consistent branding also helps. If you use the same colors, text style, and tone in every Reel, your content gets easier to spot in the feed. Over time, that familiarity builds trust.
It also helps to keep references local and familiar to your audience. Those small details make the content easier to recognize and trust. Use UpGrow's live analytics to see which Reel types lead to follows and profile visits.
The main aim is simple: build a repeatable system that teaches, builds trust, and drives growth without burning you out.
Aim to post 4–5 fitness Reels per week on a steady schedule. That gives Instagram enough fresh content to test with your audience, without pushing you into rushed, low-quality posts.
It also makes it much easier to track what performs best.
If you’re just getting started, don’t hit record right away. Start by picking your Instagram goal, pair it with a hook formula that already works, and write a script with a numbered shot list for angles, timing, and on-screen text.
Then put your energy into the hook. The first 1 to 3 seconds matter most if you want to stop the scroll. If it fits your process, use UpGrow’s viral content library to spot trends before you film.
Measure performance against your goal, not just likes.
Start by matching the hook to what you want the Reel to do. Then test 3 to 5 versions of that same hook while keeping the rest of the Reel exactly the same. That way, you’re testing the opening, not a bunch of other changes at once.
After 7 to 14 days, look at the metric that fits your goal:
If viewers drop off in the first 1 to 3 seconds, the hook probably needs work.


