
Ultimate Guide to Workout Demo Content Libraries
Build a tagged workout demo library: film once, repurpose clips weekly, and use tags, analytics, and AI to optimize posts.
Build a tagged workout demo library: film once, repurpose clips weekly, and use tags, analytics, and AI to optimize posts.
4.98 /5 - from 58k reviews
Trusted by 50,000+ creators — get real engagement delivered to your profile in minutes, not days.
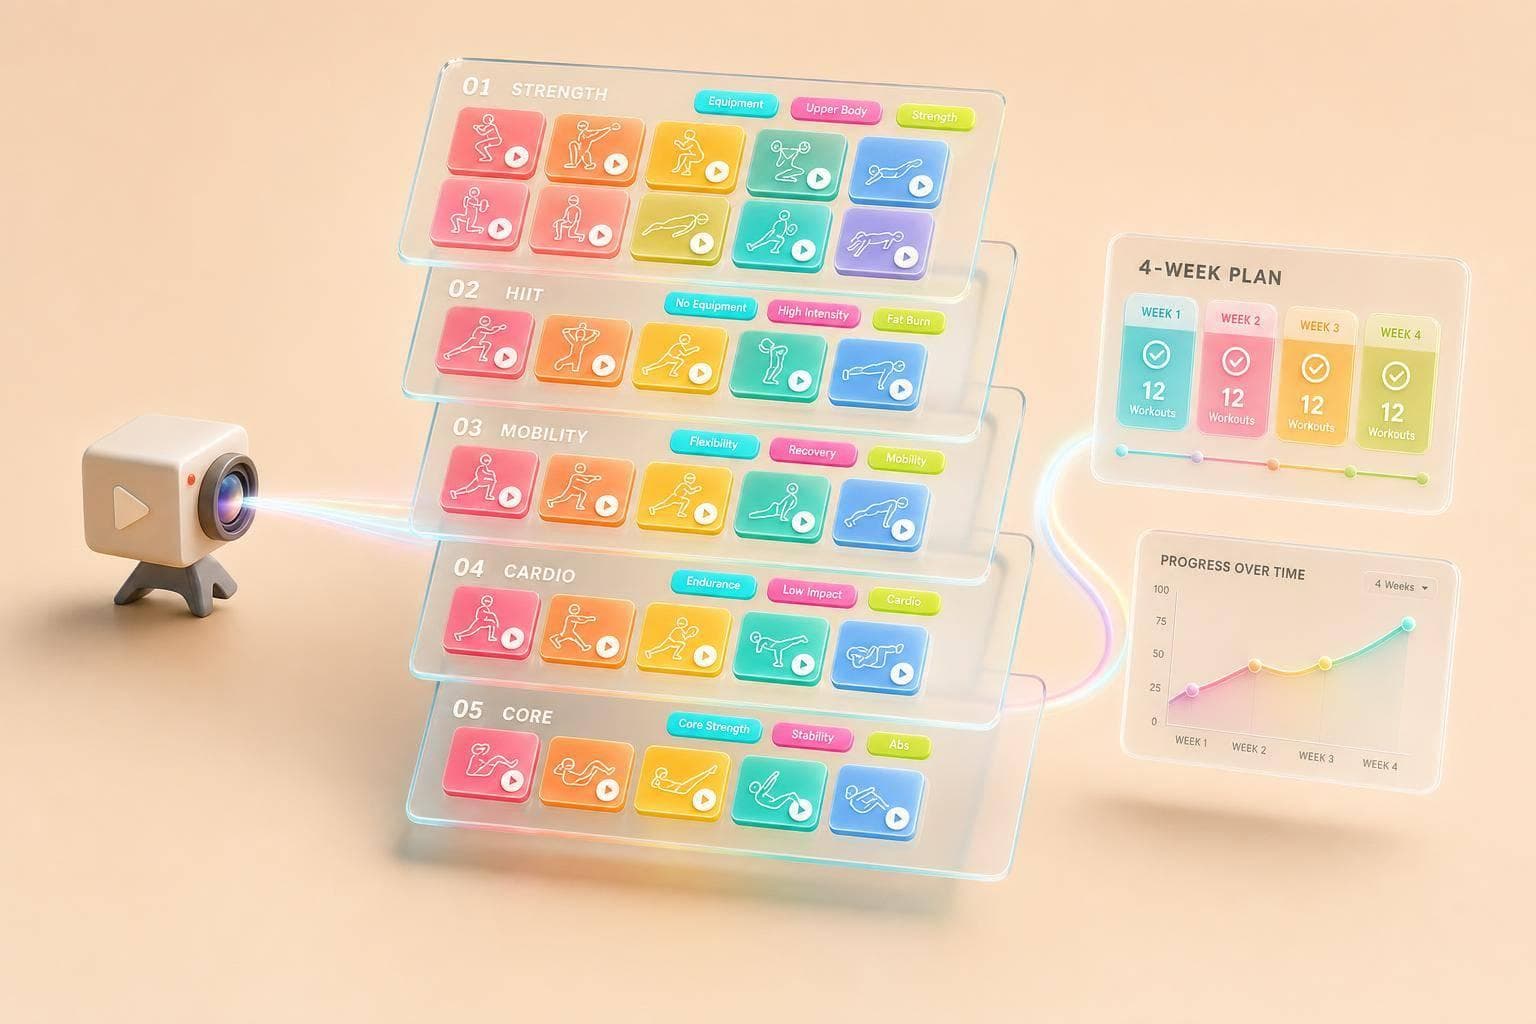
If I want to post fitness content 3 to 5 times per week without filming every day, I need a workout demo content library as part of my social media workflow. It gives me one place to store exercise demos, full workout clips, and b-roll, then sort them by movement, goal, audience, and format. That matters because posting 3–5 times weekly can help accounts grow faster than posting 1–2 times, and 10+ posts per week can push growth even more.
Here’s the whole idea in plain English:
In short: this is a simple system for filming, organizing, posting, and reviewing fitness content without starting from zero every week.
A fast way to think about it is this:
| Part | What I keep there | What it helps me do |
|---|---|---|
| Exercise demos | One-move clips like squats, presses, and hinges | Post form tips, short Reels, and save-focused content |
| Full workouts | Circuits, class cuts, follow-along clips | Build weekly posts and longer watch-time content |
| B-roll | Gym shots, coaching moments, equipment close-ups | Add hooks, transitions, and story posts |
| Tags | Goal, level, setting, equipment, style | Find the right clip in seconds |
| Review | Reach, plays, retention, saves, shares | Decide what to reuse and what to change |
If I keep the library clean and review results every week, posting gets easier, the feed stays on-topic, and each shoot gives me a lot more mileage.
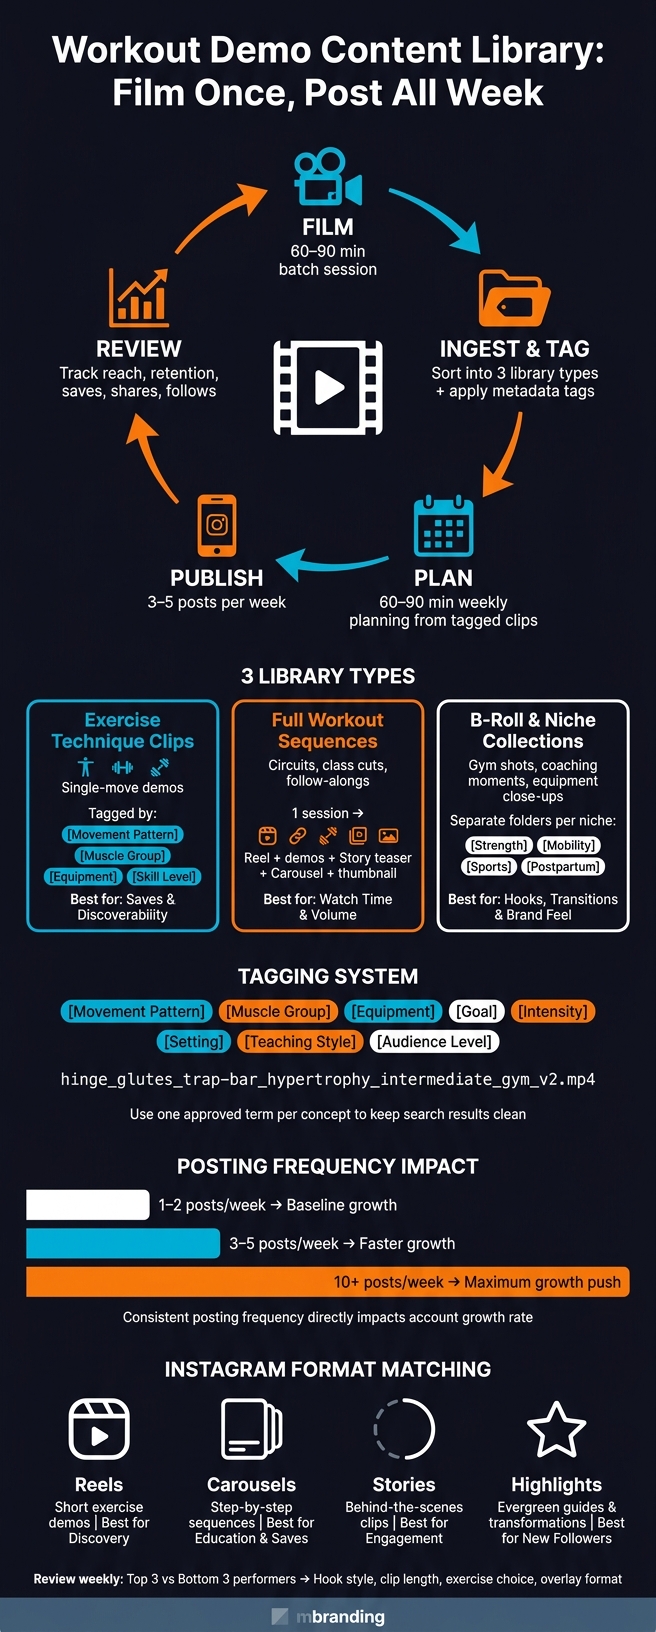
Workout Demo Content Library: Film Once, Post All Week
Workout clips work best when you split them into three library types. Each one supports a different posting need and helps with different goals, like discovery, saves, shares, and education.
These are your single-move demos. They’re the backbone of any fitness content library.
A solid technique collection is usually sorted by movement pattern (squat, hinge, push, pull, carry), muscle group (glutes, shoulders, core), equipment (dumbbells, resistance bands, cable machine), and skill level (beginner, intermediate, advanced).
These clips do one job well: they show people how to perform a movement the right way. That makes them strong for saves and shares. If you want more people to save them, add the exercise name and one clear cue. Simple works.
Full sequences give your library more depth. This can be a 12-minute dumbbell circuit, a lower-body strength block, a 60-second mobility flow, or a condensed class clip.
This type of content is also efficient. One filming session can turn into a lot of assets:
All of that can be ready to publish across formats without starting the edit from zero each time. When you sort these clips by goal and length, it gets much easier to match the right asset to the right posting slot.
A good library needs more than teaching clips. It also needs support footage.
B-roll includes training environment shots, equipment close-ups, and coaching moments. These clips are useful for intros, transitions, and text overlays, so you don’t need a full teaching demo every time.
It also helps to separate assets by audience and training style. For example, you might keep different folders for strength training, functional fitness, sports performance, and mobility. Each one speaks to a different audience segment and a different content style. If unrelated styles get mixed together, the feed can start to feel scattered. Keeping them separate makes publishing faster and keeps your message clear.
| Collection Type | Best Use Case | Strengths | Limitations |
|---|---|---|---|
| Exercise technique clips | Form tutorials, corrections, beginner education | High saves, strong discoverability, easy to repurpose | Shorter retention if too static; needs clear cues to stand out |
| Full workout sequences | Weekly posting volume, follow-along Reels, class highlights | Drives watch time, supports consistent cadence, highly saveable | Requires more editing; longer planning time |
| B-roll & niche-specific | Transitions, hooks, brand storytelling, niche targeting | Flexible, polished feel, supports different content types | Doesn't teach on its own; needs pairing with instructional content |
Once these collections are separated, the next step is tagging them so each asset can be found and reused fast.
Without tags, a library gets messy fast. Finding the right clip turns into digging through files and hoping you remember where something lives. Once clips are tagged, weekly planning gets much simpler: filter, pick, and build the post.
Tag every clip with movement, muscle group, equipment, goal, intensity, setting, teaching style, and audience level. For day-to-day publishing, put extra attention on the tags that speed up planning: goal, intensity, setting, teaching style, and audience level. Movement pattern, muscle group, and equipment were already handled during collection sorting.
A Romanian deadlift clip, for example, might be tagged: hinge / hamstrings/glutes / barbell / hypertrophy / moderate / commercial gym / voiceover + on-screen cues / intermediate. Once those tags are in place, the right clip shows up in seconds.
Use one approved term per concept so search results don’t get split up.
Example: hinge_glutes_trap-bar_hypertrophy_intermediate_gym_v2.mp4
Your folder structure should match how your Instagram account is positioned for growth. Top-level folders organized by goal - Fat Loss, Hypertrophy, Mobility, Strength, Postpartum Training, Older Adults, Athletes - make planning easier because you can jump straight into the right section. Inside each goal folder, sort clips further by audience level or setting.
Each clip also needs a content pillar tag tied to your Instagram strategy. One Romanian deadlift clip can do more than one job:
That pillar tag helps you pull a balanced weekly mix straight from the library - three workout demos, two education posts, one coach life post - without guessing or overloading one content type.
Manual tagging can work, but it slows down as the library grows. AI handles large volumes much faster. It can auto-detect movement, equipment, setting, text, and spoken cues, which helps keep big libraries aligned without adding more review time. Those tags then feed batch planning and post assembly.
| Method | Speed | Consistency | Searchability |
|---|---|---|---|
| Manual tagging | Workable for small batches | Depends on team discipline; prone to human error | High if rules are followed |
| AI-generated tagging | Fast at scale | High once models are trained; uniform across the library | Very high; surfaces clips by movement, equipment, and complex attributes |
| Basic platform metadata | Instant | Limited scope | Low to moderate; useful for chronological sorting and batch organization |
The most practical setup is a hybrid workflow. Start with a small manual tag set during ingest so clips are usable right away. Then run an AI pass to add more tags across the library. Basic platform metadata can handle chronological sorting and batch organization in the background.
With that system in place, you can go from library search to publishing without the usual scramble.
Once clips are tagged, the next step is turning them into a weekly system you can repeat without thinking too hard about it. At that point, the flow gets simple: film, ingest, choose, and publish.
Treat each shoot like a content block, not just a workout. A single 60–90 minute session can give you a full workout sequence, 8–15 standalone exercise clips, alternate angles for complex lifts, and b-roll. That’s enough material to cover a week of content. The point here isn’t one post. It’s building a library you can keep pulling from.
Shoot in 9:16 vertical (1080×1920), export as MP4/H.264, and use clean lav audio with front lighting. After filming, import everything into a session folder and sort clips into subfolders like Full-Workouts, Exercise-Clips, Angles, B-Roll, and Audio-Notes.
From there:
That small bit of cleanup saves a lot of time later.
A 60–90 minute weekly planning session can support 3–5 feed posts, plus Stories. The big shift is this: weekly planning should start with tagged clips from your library, not raw footage. You’ve already done the hard part, so don’t start from scratch each time.
Build each post the same way every time. Pull a pre-tagged clip, trim it to 7–20 seconds for Reels, add on-screen text with the exercise name and one key cue, write a caption with a hook, then schedule it for the best time to post on Instagram when your followers are most active.
Save finished posts to a campaign folder such as Week-of-2026-09-14_IG-Queue. It also helps to keep a 1–2 week content bank. Life happens. A small backlog gives you breathing room when filming or editing gets delayed.
Next, match each asset to the Instagram format that fits it best. Short exercise demos work well in Reels because they help with discovery. Step-by-step sequences and full workouts fit Carousels, where each slide can show a progression like setup, movement, and common mistakes. Behind-the-scenes clips fit Stories, where a looser style feels natural. Evergreen pieces, like a beginner glute guide or client transformations, should go into Highlights so new followers can find them right away.
| Workflow type | Approx. production time per post | Weekly post volume | Key advantage |
|---|---|---|---|
| Solo creator | 45–90 minutes | 3–5 posts | High authenticity, low overhead |
| Team-based | 20–45 minutes (per role) | 5–10 posts | Higher volume, specialized skills |
| AI-assisted | 15–30 minutes | 5–10+ posts | Faster editing, data-driven decisions |
AI tools like UpGrow can help surface stronger clips faster with smart filters, a viral content library, and real-time analytics, while staying Instagram-compliant.
Once posts are scheduled, review performance and use what you learn to shape the next batch.
Not every metric tells you the same story. For workout demos, it helps to sort performance into three layers: distribution (reach, plays), attention (view duration, completion, retention), and value (saves, shares, profile visits, follows).
That breakdown makes review a lot easier. If reach is high but plays are low, the opening probably needs work. A tighter hook or a stronger first second can help. If plays look good but retention drops off, the pacing may be off or the clip may take too long to get to the movement. If people finish the video but don't save or share it, add something more useful, like rep counts, form cues, or a short programming note. Those actions show whether a clip is worth making again.
Use Instagram's per-Reel View Insights with the Professional Dashboard so you can compare single clips against account-level trends. Then do a short review once a week. Pull your top 3 and bottom 3 performers and look for patterns in:
That review helps you decide which movements, camera angles, and cue styles deserve more footage in your library.
Once you know which clips get the best retention and saves, use those as your next test set. A 30–60 minute session can be cut down much faster with an AI editor. It can spot cut points, flag full reps, and pull out 10–30 second clips without dead air. It can also tag repeat movements so you can build multiple series from the same session.
After AI pulls the best options, start testing. Try different hooks, overlay styles, and runtimes against each other. A simple setup works well: run multiple versions of the same clip with different intro text, a different overlay look, or a different length, like 15 seconds, 25 seconds, or 35 seconds. Then track completion rate and average view duration across each version. Look for the same winner across at least 3–5 tests before you treat that format as your new default. Let AI help with clip selection and testing, but keep final form checks manual.
UpGrow fits into this process on the growth side. Its AI-powered targeting uses filters like location, age, gender, and language to connect your demos with the people most likely to engage. That matters even more when your library is already split by niche and audience, such as beginner home workouts or women's strength training. The real-time analytics dashboard also tracks follower growth patterns and content effectiveness, so you can spot which demos are worth pushing and which ones need another pass.
The long-term system is pretty simple: build clear collection types, tag every clip the same way, plan each week from your library, and review performance on a steady schedule. Each step supports the next. Good tags make planning faster. Good planning makes analytics easier to read. Cleaner analytics help you make better clips next time.
Here's how the three main review approaches compare:
| Approach | Time per week | Insight depth | Best use |
|---|---|---|---|
| Manual review | High | Deep, qualitative | Exercise accuracy, coaching cues, brand fit |
| In-app analytics | Moderate | Medium | Comparing reach, retention, saves, and follows |
| AI-assisted testing | Lower per iteration after setup | High for pattern detection | Finding clip candidates, testing hooks and lengths |
A practical way to start is with manual review and in-app analytics, then add AI-assisted testing as your library gets bigger. That gives you a repeatable loop: film, tag, publish, review, and refine. Over time, each cycle should give you clips that hold attention a bit longer and turn more viewers into followers.
Start by collecting 15 to 30 Reels in your niche that beat what similar accounts are posting. You can find them through Instagram’s Explore page, hashtag results, and audio pages.
Then sort everything in a spreadsheet or a Notion table. Track the format, the hook style, and estimated engagement so you can see what keeps showing up.
Once you’ve saved 15 to 20 examples, use AI to group them by angle, format, and creator style. That makes it much easier to spot patterns you can reuse instead of guessing what might work. If you want to move faster, UpGrow’s viral content library can help.
Use a structured tagging system built around core metadata: creator name or ID, campaign, format, product shown, language, and rights status. For U.S. compliance, add tags like #ad or #sponsored when required.
You should also tag each asset by strategy. That includes persona, tone, visual style, hook, and call to action. This gives you a much better way to sort clips. Instead of digging through folders by hand, you can find content by intent.
AI-backed tools can apply these tags automatically, which saves time and makes the library easier to search.
It depends on your account size and what you're trying to do.
Smaller accounts should check performance weekly. Larger campaigns usually do better with monthly reviews.
Use weekly check-ins to tweak hooks, headlines, or posting times. When you're running tests, watch the first 24 to 72 hours closely, give it 5 to 7 days to size up early results, and use 7 to 14 days to confirm what the data is telling you.


